

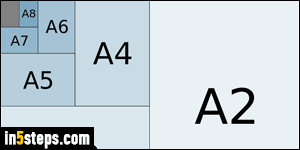
By default, Word creates documents with pages matching the standard sheet size in your country. In the US, the default paper format is Letter (8.5 by 11 inches). But you can easily change it to common page formats like the longer Legal format (8.5 by 14 inches), or the super common A4 page size, used throughout Europe. And you can even create custom page dimensions!
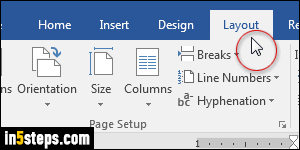
Once in Word, click on the Layout tab in the ribbon. (Note that I'm using Word 2016, but all steps are exactly the same in Word 2013 and Word 2010!)
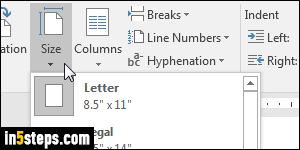
Now click on the Size dropdown button: if you are in the US, you should see the same paper dimensions shown on the screenshot. In other countries, the content of that dropdown menu show common page sizes for your area.
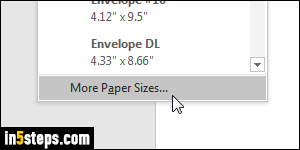
If none of the sizes was the one you wanted, click on the More Paper Sizes button at the bottom of the menu. This opens the Page Setup dialog, with the "Paper" tab preselected. You can now completely customize page width and height, and even select different dimensions for the first page! To always use this paper format by default, click on the "Set As Default" button in the bottom left corner. Either way, click on the OK button to use that new page size.
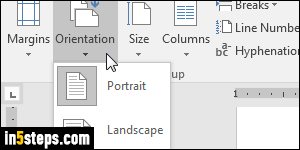
To show (and print) horizontal pages, no need to create a custom paper format! Instead, just click on the Orientation dropdown, also under the Layout tab, and switch between Portrait (vertical) or Landscape (horizontal). Keep in mind that you can also change your document's margins to reflow text like you want.