

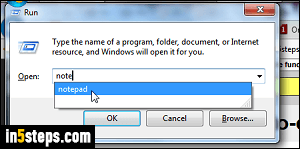
By default, Windows 7 auto-completes text by suggesting matches based on what you've typed so far. Once the entry you want appears in the dropdown list, you can click on it with the mouse, or use the Up / Down arrow keys and the Enter key to select it. On the screenshot, I'm about to do that with the mouse. Older versions of Windows used to auto-complete by automatically selecting the likely match: if you hit Enter, that match is used, which is much faster!
In 5 steps
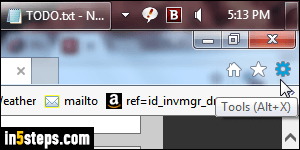
You can restore that functionality, but not through accessibility options in the Control Panel, as you would expect. This setting is buried inside your Internet Explorer settings, even if it affects the entire operating system. So, launch Internet Explorer, and click on the "Options" gear icon in the top right corner.

Select the Advanced options tab at the top.
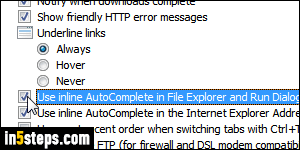
Scroll about a third of the way down, right below the Underline links icon: then, check the "Use inline AutoComplete in File Explorer and Run Dialog" checkbox. That the same option is enabled by default for IE's address bar (where you search from, or type URLs). Click OK to save your new settings.
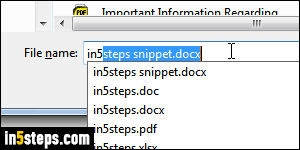
Despite that option's wording, the auto-complete with selection functionality works in many areas. On this screenshot, I'm using the classic open dialog in Word 2016, and notice that it selects the end of the auto-complete match!