

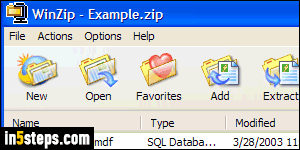
The title was already too long, but the way you create zip files is the same in Windows 7, Windows 8, and Windows 10. Before XP and Vista, you needed a third-party program like WinZip to create zip files, but that functionality is now included in Windows. Microsoft calls it "Compressed zipped folder", but it's the same thing: "zip" is just a compression algorithm (recipe) to make your files smaller. It's also useful to share multiple files as a single email attachment!
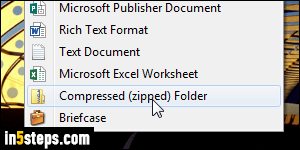
There are two approaches: (a) create an empty zip file and then add files to it; (b) select the files and folders you want to compress, and add them all in a single swoop to a compressed zip folder created on-the-fly! If you already have in a folder all the files you want to zip, the second approach is easier. To create an empty zip folder, right-click on an empty area of your desktop (or folder inside Windows Explorer), and go to New > Compressed (zipped) Folder.
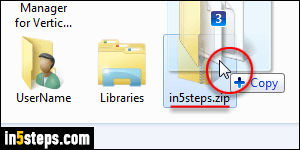
Type a name for your zip file and hit Enter (if you are showing file extensions, leave / include ".zip" at the end of the file name). Once you're ready, drag-and-drop files and folders from their current location onto the zip file, as shown on the screenshot. The plus sign that appears means that the files will be copied, not moved. If you no longer want the original files, just delete them.
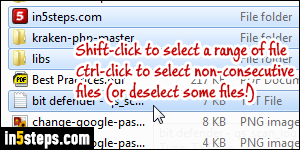
To zip existing files into an archive, no need to create a separate zip file. First, select the files. Selection tips: hold down the Ctrl key and click on one file after the other to add or remove them from the selection. To select two files plus all the ones in between, click on the first file, hold down the Shift key, and click on the second file. You can Ctrl-click to deselect files you don't want.
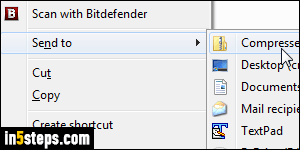
Once you've selected the files, right-click on any of them: don't standard / left click, or you'll lose your selection! This time, choose "Send to > Compressed (zipped) folder". Within seconds, depending on the number of files you selected, and their size, a new zip file will be created. Type a name and hit Enter (by default, Windows names it after one of your selected files / folders).

Bonus Tips:
- Binary files (images, movies, music, etc.) don't compress that well. Text-based and Microsoft Office files, on the other hand, become quite a bit smaller.
- The built-in zip file creation in Windows 7 / 8 / 10 doesn't currently support passwords. It is possible to create password-protected zip files, but you'll need to download and use a third-party application like WinZip or WinRAR.