

In Word 2007, you could download a free Microsoft add-on / plugin to export your documents as PDF, straight from Word. Since Word 2010 (and this was maintained in Word 2013 and Word 2016) you now can save as PDF "out-of-the-box": no extra plugin or download is required! There's even a couple of PDF export options we'll go over - like password encryption and accessibility.
In 5 steps
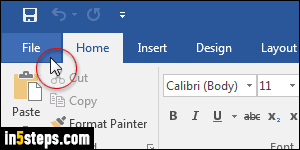
Open the Word file you want to convert to PDF and click on the File button in the top left corner of the window: this will open the "Backstage view".
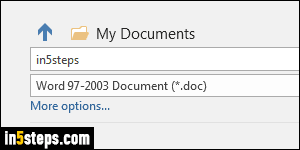
Select the "Save As" option on the left. In Word 2010, it will open the Save As dialog. In Word 2016 / 2013, you'll see the file name and file type on the right, but you can restore the old Save dialog. (In my case, Backstage view shows a Word document saved in compatibility mode - useful option to know about.)
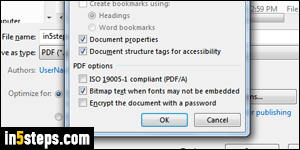
In all cases, click on the dropdown menu and select "PDF (*.pdf)". Before saving, notice that an Options button / link appears after you pick PDF. Click on it to password-protect your PDF or save it in the ISO-compliant, PDF/A format. Note: a password-protected Word document will not automatically generate a password-protected PDF file! You have to do that manually.
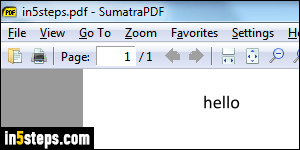
Once you've selected PDF and reviewed the export options, click on the Save button. Unlike when you save in an editable format, the file won't open in Word. Instead, Word will open the exported file in your operating system's default PDF viewer (Acrobat, Sumatra on Windows, the Preview app on Mac OS X, etc.)