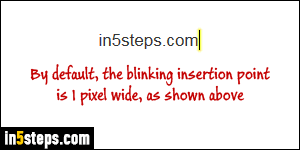
By default, the width of the text cursor / blinking insertion point is 1 pixel. That's the vertical bar, highlighted in yellow on the screenshot, that indicates your position in an editable text field, or any text editor. But you can change the thickness of that insertion point to make it look both more proportionate and easier to see. As bonus, I'll also show you how to make it stop blinking!
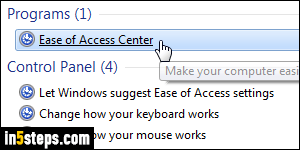
In Windows 7 and Windows 10, open the start menu, and type "ease" in the search field, short for "Ease of Access Center" (the area of the Control Panel covering assistive technologies). Click on the Ease of Access Center result at the top. Now click on the "Make the computer easier to see" link in the Control Panel screen that opens. In Windows 8 / 8.1, type "ease" in the start screen instead. Other steps are identical in all recent versions of Windows!
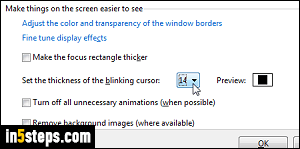
Scroll down to the very bottom: click on the "Set the thickness of the blinking cursor" dropdown menu to pick a new width (in pixels). "1" is the default; "2" is my favorite: it looks just a bit thicker, without becoming distracting. To show a square insertion point (like old computers you see in movies), select "14". As you change thickness, the insertion point preview is updated on the right (see screenshot). Once done, click OK to apply the new width and test it out!
Depending on the reasons for which you changed the thickness of your text cursor, here are a couple of settings that you might find useful: you can make your mouse pointers larger (by quite a bit!), you can underline shortcut keys (hints of keyboard shortcuts you can use in menus, text fields, and buttons), and you can change the speed of your external mouse's scroll wheel.
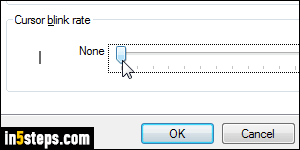
Bonus Tip: you can also change the cursor blink rate. In other words, how many times per second it blinks inside an editable text document. You can even disable the blinking altogether, a very nice setting I often use. Open the start menu, type "blinking" in the search field, and click Change cursor blink rate. To prevent blinking, just move the slider all the way to the left and click OK!

