

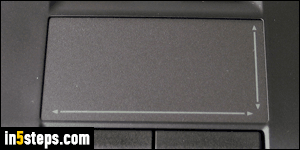
An earlier tutorial showed you how to change an external mouse's scrolling speed. Windows gives you the same type of control over the scroll speed of your laptop's "trackpad". Your exact settings will depend on the brand (HP, Dell, Asus, Acer, Samsung, etc.), but also on your hardware. Some laptops, for example, include vertical and/or horizontal strip on the trackpad, specifically designed for scrolling: older ThinkPad models by IBM / Lenovo come to mind.
In 5 steps
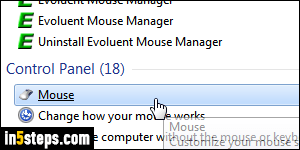
Unless your laptop comes with a special utility, these options are hosted under Windows' own mouse settings. Open the start menu and type "mouse" in the search field. Click Mouse under Control Panel. (Screenshots in this tutorial were taken in Windows 7, but the steps are the same in Windows 10.)
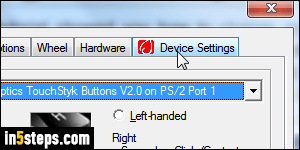
When the Mouse Properties dialog pops up, select the "Device Settings" tab on the right. That's where computer manufacturer's custom hardware can be controlled. This tab will typically not exist at all on a desktop PC.
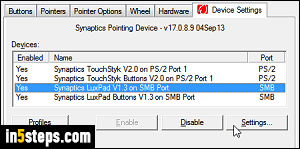
Using my case, here's what you'll see on an HP laptop (EliteBook, ZBook, Spectre, etc.) Since the company uses third-party firmware by Synaptics, things will look the same for any laptop that also uses Synaptics, like those made by Lenovo. Select one of the entries for LuxPad and click on Settings.
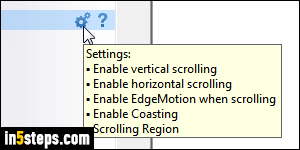
Make sure that Scrolling is checked and click on the gear icon. In the popup, drag the slider towards Slow or Fast. (Notice that you can also set up scroll bands for one-finger scrolling.) Click OK to apply the new setting!
Tip: you can also change trackpad speed on a MacBook (Pro / Air, or any other Apple laptop). You can even change the two-finger scroll direction!