

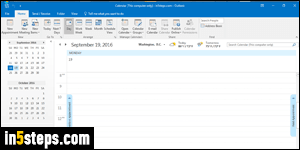
By default, Microsoft Outlook's calendar shows work hours starting at 8.15am, and ending at 5pm. These business hours setting determines which hours will show when you look at the day view or work week view. The closer these are to your actual working hours, the less scrolling around you'll have to do! Also by default, Outlook sets your working days (business week) as Monday-Friday.
In 5 steps
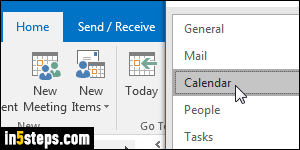
I'm using Outlook 2016 for this tutorial, but all steps are identical in Outlook 2013 and Outlook 2010. Once in Outlook, click on the File button (top left corner), and choose Options. Now select the Calendar settings on the left.
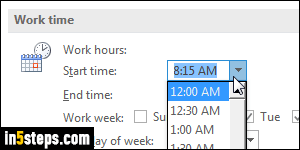
Under Work time, select a starting hour in the Start time dropdown menu. While there are presets for every half-hour, you can also type a custom value for that start time. Just make sure to use the same format as Outlook: Windows can show military time, for example. If you use a number of minutes lower than 10, add a zero in front of it. For example, "10:07", and not "10:7"!
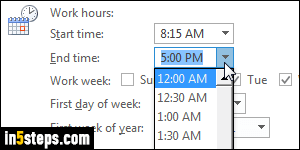
Do the same thing with End time, to pick the close of your business hours. If you go above 8 hours, you'll have to scroll to see the end of the day, but Outlook will still let you make your business hours as long as needed.
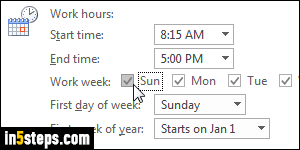
I already explained how to change the first day of the week, but notice that Outlook also lets you pick which days are part of your work week: just check (or uncheck) the checkboxes next to each day name. You can change the week of the year as well (the week that includes January 1st, by default - unrelated with the fiscal calendar your organization uses). Click OK to save your changes.