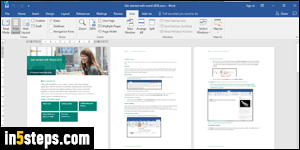
By default, Microsoft Word shows your documents in 1:1 scale - without any kind of zoom applied, in other words. But if the document is saved with a particular zoom applied, that zoom will be visible when you share that file with others (remember to show normal scaling before saving and sharing!) I'll show you how to change zoom level, and show multiple pages at the same time.
In 5 steps
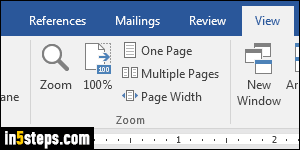
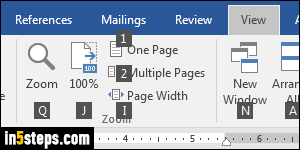
Once in Word, click on the View tab in the ribbon: all relevant commands are grouped under the Zoom section in the middle (see screenshot). Clicking on the Zoom button opens a popup that lets you pick a magnification level, or pick the number of pages you want to show at once. But this is all a bit cumbersome!
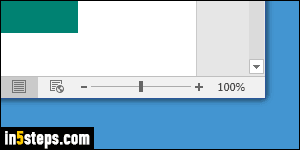
A much faster way to zoom is to use a mouse shortcut, or the slider in the lower right corner of the MS Word window. Clicking on the current percentage (100% in my case) opens the Zoom dialog mentioned in Step 2. Better yet, hold down the Ctrl key on the left side of your keyword, and scroll your mouse wheel to zoom in or out. (On laptops, you can use your trackpad with the Ctrl key!)
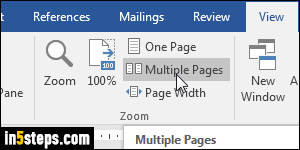
More zoom-related commands from the ribbon: "One Page" goes back to the default. "Multiple Pages" shows pages stacked from left to right. The number of pages you see at once depends on your zoom level: the more zoomed out you are, the more pages you see! "Page Width" makes the page as wide as possible without scrolling, based on the size of the Word window.
Note: Word auto-restores the previous zoom level when you launch it.
Bonus Tip - Zooming keyboard shortcuts:
These shortcuts work in Word 2016, but also in Word 2013 and Word 2010, and even earlier versions for some of these! Alt+W, J to reset the zoom level back to 100%. Alt+W, 1 to show just one page; A+W, 2 to show multiple pages. Alt+W, i to show one page per full width. Alt+W, Q shows the Zoom dialog.

