


Taking a picture of what's currently visible on your screen is the best way of describing a problem to your system administrator or tech support person, and it will cut down on the time you spend describing your issue! There are plenty of free and paid screenshot tools online, but you don't need them for basic screen captures: your PC comes with the tools you need. Note that this tutorial also applies to Windows 8 / 8.1, Windows 10, and Vista - not just Windows 7!
In 5 steps
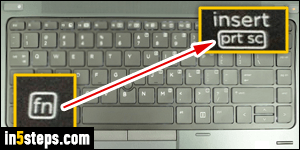
Without launching any tool, just hitting the Print Screen key copies a picture of your screen to the Windows clipboard: that's the same area where text goes when you copy text in a text editor or from a web page. The Print Screen key might be abbreviated to something weird like "Prt Sc", but it's nearly always in the upper right corner of your keyboard. On some keyboards, and most laptop keyboards, you have to hit a "function key" combination to activate the print screen key. Example: on HP laptops, hit the fn and the insert or home key.
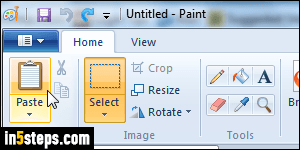
Once you've hit Print Screen, you have two options: directly paste your screen capture in an app that accepts pictures from the clipboard, like Outlook, OneNote, and many more. Or save the screenshot to your hard drive, for future reference and/or to share it as an attachment, upload it to a photo sharing site, etc. To do that, open the start menu, and type "paint" in the search field: when MS Paint opens, choose to Paste, and save the file. The screenshot will automatically be saved as a PNG file: that's perfect, keep that image format.
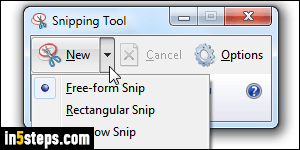
But Windows also includes a utility called the "Snipping Tool", which is great if you keyboard doesn't have a dedicated Print Screen key! The tool is under All Programs > Accessories, but you can just type "snipping" in the start menu's search field to launch that app. The screenshot shows the main screen capture options: free-form snip lets you draw a random shape on the screen, and the screenshot will contain whatever's inside the outline you traced. Rectangular snip takes a screenshot of whatever's inside the bounding box you traced.
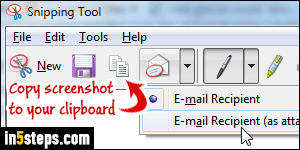
Window snip highlights an "interface element" on the screen, surrounding it with a red line: one of the windows in the background, the taskbar, a menu, etc. When you click, that area of the screen will be copied to your clipboard. Tip: holding down the Alt key while hitting Print Screen will take a screenshot of the current (active) window! The last option, Full-screen snip, takes a screenshot of the entire screen, just like the Print Screen key does! Now click on the Copy button, or email the screenshot inline / as email attachment.
Bonus Tip: if OneNote is installed, hold down the Windows logo key on your keyboard and hit "S" (as in screenshot!) It will dim the screen, and show a crosshair cursor: drag the area of the screen you want to copy. Once you let go of the mouse button, OneNote will copy that area (or give you the option to). I used an old screenshot I had from OneNote 2010, but it's behaves exactly the same way in OneNote 2013 and OneNote 2016 - and even earlier versions.