

By default, you can edit any file you created. In fact, most files you didn't even create can also be changed, and changes you save are written into that original file. But what if you want to prevent people from making changes to a file? I came across that problem when sales people accidentally made changes to a MS Word file designed to be used as a template. The problem was easily fixed: I just showed the sales manager how to make a file read-only, and that's it!
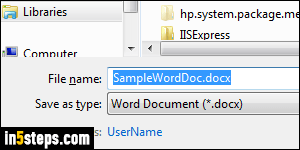
When a file has an edit-lock, which you do by setting its read-only property, you can make any changes you want to the document, but you won't be able to save them. If you try, you'll get Save dialog, as shown on the screenshot. You'll have to type a new name, because the original file cannot be overwritten!
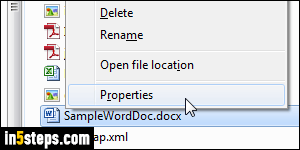
Navigate to the folder containing the files you want to mark as read-only (text documents, spreadsheets, images - anything). Select the file by clicking on it; to select multiple files, hold down the control key (Ctrl), and click on one file after the other. Then, right-click on any selected file and choose "Properties".
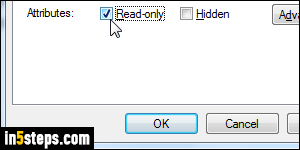
In the Properties dialog, with the General tab selected, check the "Read-only" checkbox at the bottom. The Hidden checkbox, unchecked by default, allows you to go one step further in protecting your files by making them invisible. Hidden files are invisible by default, but any Windows user can easily enable showing hidden files, so this protection isn't bullet-proof: it just helps avoid accidental overwrites or inadvertent file deletions. Click OK to save.
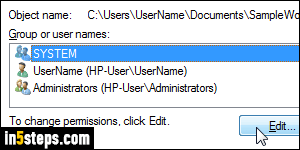
To resume allowing users to edit a file, go back to the Properties and uncheck the "Read-only" checkbox. For more advanced ways of preventing others from modifying important files, look into file sharing and permissions: Windows lets you, on a single PC or on the local network, restrict who can view (read), change (write), or get full control over the file. These options are also in the Properties dialog, under the "Security" tab, which is pictured on the right.