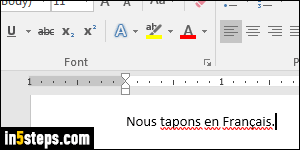
Microsoft Word comes with its interface (buttons, menus, etc.) in the language for which you bought a serial number. But it supports editing documents, including grammar-proofing and spell-checking in pretty much any language you can think of. I'll use Word 2016 to show you how to add more languages, but the steps are the same in Word 2013 and Word 2010, maybe even Word 2007! Without those, your text will be filled with perceived spelling errors.
In 5 steps
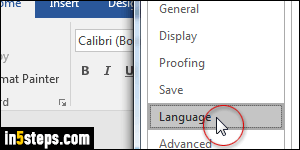
Once in Word, click on the File button (top left corner), and select Options. When the popup dialog opens, select the Language settings on the left.
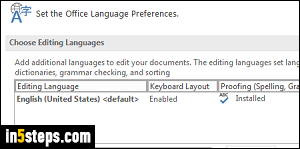
Under the Choose Editing Languages header, you'll see a list of languages currently installed in Word. By default, this is just the default language (in my case, English). Below that list is a dropdown labeled "Add additional editing languages": select one language from it, and click on the Add button.
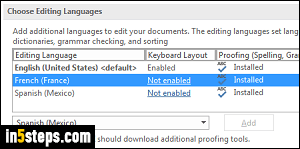
I just installed French and Spanish (notice that for languages that have regional variations, the related country is shown between parentheses). Click OK to save your setting, then click OK to dismiss the "Please restart Office so that your language changes can take effect" message. Once you've closed and re-launched Word, you can switch language from the status bar (bottom).
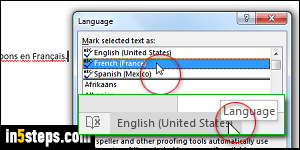
Select the portion of text you typed in another language (or hit Ctrl+A to select all, if the entire document is in that language). Then, click on the current language name in the status bar to open the language popup. Pick the language you want to use and click OK. As soon as you do, the selected text will be interpreted as French / Spanish / etc. by Word, and no longer flagged as misspellings in your original, default language (see first screenshot).
Bonus Tip - Changing Microsoft Word's default language:
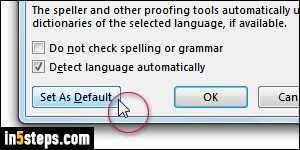
If you bought an American version of Word (with "English United States" as the default language), but you do most of your editing in French or Spanish, you can change the default editing language by clicking the "Set As Default" button in the Language dialogue from the previous step, and clicking OK.

