


MS Paint includes a function that lets you invert the colors of an image for the entire picture, or a selected area of the photo. Lighter colors become darker, and vice versa ("negative image"). Contrast the in5steps logo in the screenshot with the one on this website! Behind-the-scenes, it inverts the values of the red, green, and blue portions of the color at each pixel. In the print world, the CMYK color model is used; on-screen, all colors are created with the RGB model.
In 5 steps
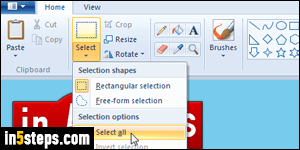
To invert the colors of the entire image, hit the Ctrl+A keyboard shortcut (the same hotkey that selects all text in an editor). You can also do the same thing by clicking on the Select submenu, and pick "Select all" from the menu. Avoid dragging to select all, because it's too easy to accidentally move the image!
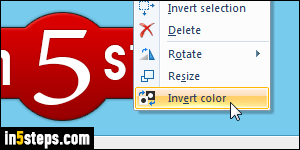
Right-click anywhere inside the selection and choose "Invert color". Older versions of MS Paint (in Windows Vista, XP, and earlier, used to support the Ctrl+i keyboard shortcut, but that's unfortunately no longer the case). As soon as you do, Paint shows a "negative image" version of the original! In traditional photography, the film -or "negative"- shows light colors dark, and vice versa. For a black-and-white image, the effect of that filter will be exactly the same!
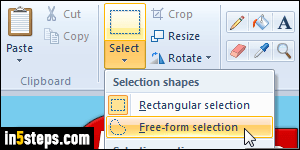
To invert the colors of only part of an image, select the area you're interested in. The default select tool creates a rectangular selection. Choose the Free-form selection tool to draw an outline around an irregular area. Once an area is selected, you can also flip or rotate it on itself (or the entire picture, if you want to create a mirror effect!) Note that there's an Invert selection tool: when it's hard to select the area you want, select the one you don't - then invert!
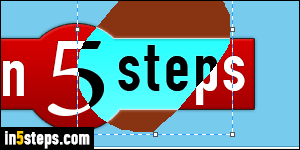
Paint always shows a rectangular selection area, even if you selected a free-form shape: don't be thrown off by that. Right-click anywhere inside that rectangle (known as "marching ants" in Photoshop) and choose "Invert color". Notice from the screenshot that while the selection looks square, MS Paint did outline the correct area, as you can tell by the inverted colors' shape!