

By default for PCs purchased in the US or Canada, Windows 7 and Windows 8 show the time using the 12-hour format, with the "AM" and "PM" suffixes. But Windows also supports "military time", the 24-hour format. (You can also use military time in Windows 10, but Microsoft changed the way you set that up.)
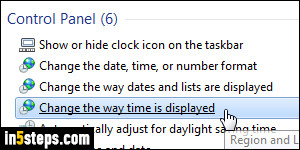
Windows 7: open the start menu, type "24 hour" in the search field, and click on the "Change the way time is displayed" link result under Control Panel.
Windows 8: go to the start screen, start typing "time format", and click on the "Change the date and time format" link that shows in the results.
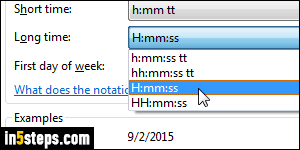
When the Region and Language dialog opens, with the Formats tab selected, click on the Long Time dropdown menu. To switch from the 12-hour, AM/PM format to military time, either select "H:mm:ss" (third value - a single digit for hours before 10am), or "HH:mm:ss" (last value) to always show 2 digits for the hours (with "06" for 6am, for example, as opposed to just "6").
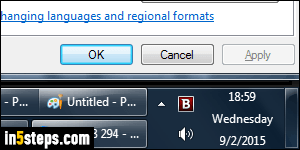
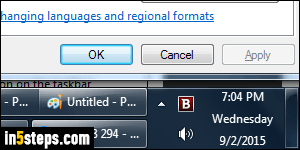
Click Apply to preview the change in Windows' system clock, as I did on the screenshot. (Note: I resized my taskbar to show the current day and date next to the clock.) Click OK if you are done, but do check out the bonus tip below.
Bonus Tips: the Short Time values, for which you can use military time, are ignored by the system clock, but used in other parts of Windows and in some third-party apps. That lets you use both the 12-hour and 24-hour time formats in different contexts. This dialog is also where you can tell Windows to use Monday (for example) as First day of the week instead of Sunday. But, in my experience, most programs ignore that setting, using their own internal one.