

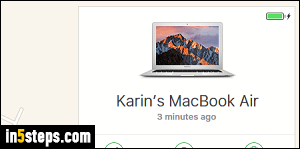
When you run Mac OS X for the first time, you'll be asked for your user name, then used to determine your computer name. In my case, my mother gave me the MacBook that ended up not fitting its intended purpose, so I inherited a computer named "Karin's MacBook Air". I don't mind the name, but changing it was a good new tutorial, so here we go! By the way (screenshot), to locate an iMac or MacBook with Find my iPhone, you need to enable Find My Mac!
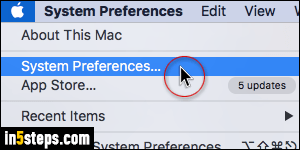
Click on the Apple logo (top left corner) and select "System Preferences".
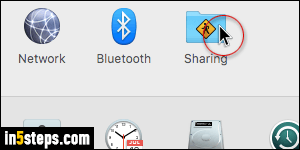
Now select the Sharing options (last icon in third row). To remember this location in Settings, keep in mind that if you share access to your computer's hard drive, it will be shown on the network using your computer name!
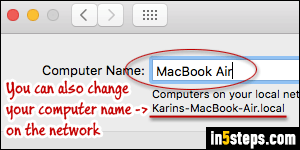
Enter the new computer name you want to use; since I only have one MacBook Air, I just named it that. Not very original, but memorable enough : )
Tip: to also change your computer name on the network, click on the Edit button, and type an (ideally matching) new name. Then click OK.
You can close the System Preferences window: your change is automatically saved. I reloaded the Find My Mac page, and notice how the new name has already been registered, and is being used by Apple. If your Mac is connected to a network, the new shared name may not appear to all until your reboot!