

If you find that your Fire phone, Kindle Fire or Fire tablet automatically changes the display brightness, it's because of the auto brightness setting. It's designed to save battery life by making your screen darker when there is less ambient light, and making it brighter when you are under direct sunlight, for example. But I find this screen dimming rather annoying, so I'll show you how to turn it off. Besides, changing brightness on-the-fly on your Fire is very easy.
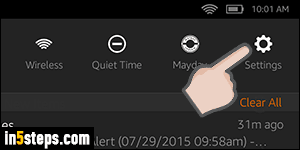
To configure your Fire, swipe down with your finger from the top of the screen, where the clock is. Then, tap on the Settings button on the right.
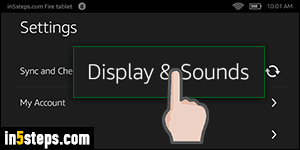
Select the "Display & Sounds" options from the list of settings. If you made your Kindle Fire text size larger, you'll need to scroll down a bit to see it.
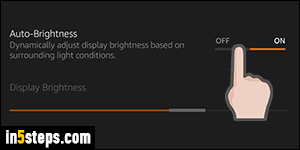
Look for the Auto-Brightness switch: when it's orange on the right, it is turned on. Tap on it once to disable the screen's automatic brightness adjustment. From now on, you'll need to manually change the brightness. Keep that in mind, because the display is the highest energy consumer on your (Kindle) Fire tablet. Also note that the "Display Brightness" option is right below: slide it left or right to decrease or increase the screen's default (current) brightness.

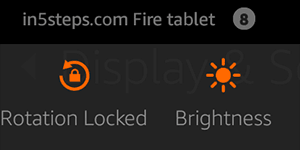
Now that you know how to access those options from the settings panel, here's a time-saving tip to manually quickly change your tablet display's brightness. Slide down with your finger, the same way you did earlier, but this time, tap on the Brightness button at the top. Notice the slider? Move it right to make the screen brighter, or left to make it darker. Also notice that the Auto-Brightness switch you saw under Settings is displayed right below - tap it to toggle!