


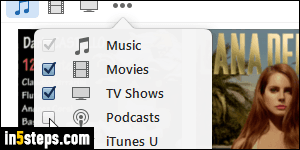
By default, iTunes for Windows shows three buttons in its toolbar (circled on screenshot). On Mac OS X, iTunes shows a dropdown menu instead buttons, but the process is the same. The default buttons are Music, Movies, and TV Shows. To access any other media, click on the ellipsis button (...), and pick between Podcasts, iTunes U, Books, Apps, Tones, or Internet Radio. The initial three are the most popular, but you can pick the buttons you want visible!
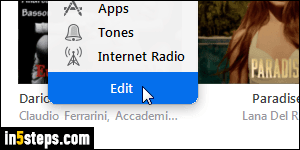
Once in iTunes, click on the ellipsis menu and choose Edit at the bottom.
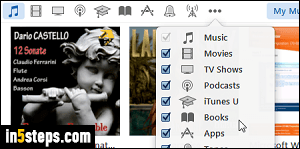
Now check the ones you want to see, and uncheck the ones you want to hide. The only one iTunes forces you to keep visible is Music (disabled checkbox).
I checked all of them, for the purpose of this tutorial: notice that all the buttons were added at the top, giving you one-click access to the parts of the iTunes Store or media you use all the time. Once ready, click Done at the bottom!
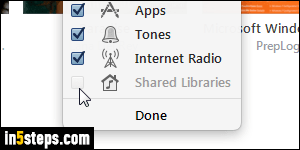
But it isn't just your own content: if you've set up Shared Libraries, where other people in your household can access your content or share theirs, you can also show that button in iTunes' toolbar. In my case, that checkbox is disabled (grayed out), because I haven't yet share my iTunes library with anyone. Unlike iTunes' classic menus (Windows only), the toolbar itself cannot be hidden.