

While you can use your Facebook account without a cell phone number associated with it, you'll quickly face limits. Besides, tying your cell phone to your account also means that you can secure it more effectively - for example, by enabling Facebook's "Login Approvals", a feature that prevents someone from logging into your account unless they enter a six-digit code, generated through your mobile Facebook app, or sent as SMS text to your phone.
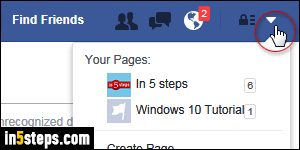
Once logged in, click on the arrow in the top right corner and select Settings.
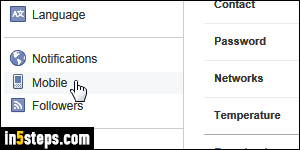
On the next screen, select the "Mobile" options in the left column.
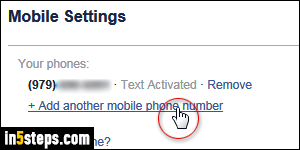
If you already have a cell phone in your account (like I do, see screenshot), click on the Add another mobile phone number link. Otherwise, click on the lone Add a phone link. Facebook lets you add multiple numbers to the same account (and even have the same phone number for different accounts).
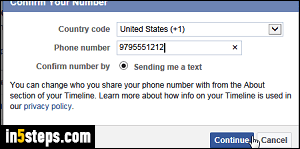
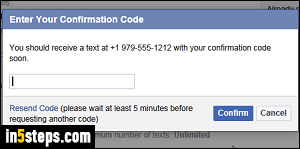
Choose your country (used for the country code), and type your phone number, including area code. Click Continue: Facebook will send you a confirmation code as SMS text message. Once you receive it, type it in the text box and click Confirm. If you see privacy options, do read them carefully: one of them gives Facebook permission to share your phone number with friends!