The sleep feature, like hibernating to an extent, is designed to conserve power: why let your PC run if you're not using it? But there are a few cases where preventing your computer from going to sleep may be beneficial, if not essential. Examples: you're downloading a huge file (a high-definition movie or operating system ISO installer file), and you don't want Windows to fall asleep in the middle! Or you're using a home computer as a server on your local network, in which case it has to remain awake and available for other users.

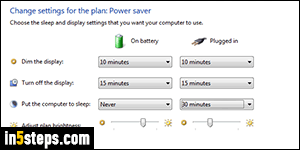
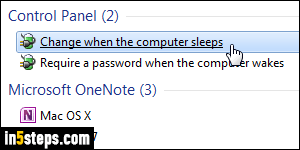
We'll nonetheless show you alternatives to completely disabling sleep. Start by clicking on the start button and typing "sleep" in the search box. Click on the "Change when the computer sleeps" link under Control Panel. This will open your power settings screen: on a desktop, you'll have only one set of options. On a laptop, you'll have both the "on battery" and "plugged in" settings.

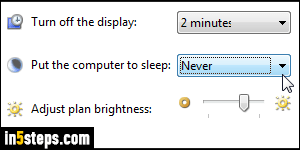
You should never disable sleep, except temporarily, while running on battery. Otherwise, your laptop will just drain the battery and crash (unless Windows detects it and protects itself from it - never tried it :) When you are connected to a power source, you prevent Windows 7 from going to sleep by choosing "Never" under the Put the computer to sleep dropdown. Otherwise, make Windows 7 wait before sleeping anywhere between 1 minute and 5 hours.

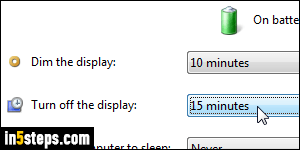
The "Dim the display" option controls how soon -during periods of inactivity- your PC will make its monitor become darker (here too, to conserve energy). This is used -or should be used like- a "pre-warning" that your PC's about to go to sleep. The "Turn off the display" setting actually powers down your monitor, whether it's external or built-in (like for a laptop or all-in-one desktop).

"Adjust plan brightness" just controls how bright the display is by default, while plugged in and while running on battery. Once you are done tweaking your power settings, click on the "Save changes" button.

