

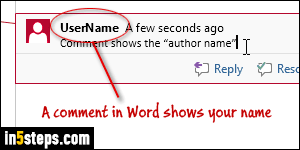
When you first installed Word / Microsoft Office on your computer (same applies to Windows PCs or Mac OS X), "author" information was taken from your operating system user name. This means that Word's author name isn't necessarily your actual name. Whenever you save, share, or comment on Word documents, your "name" will be embedded in the file and shown in comments. Fortunately, you can change the author name back and forth, as needed!
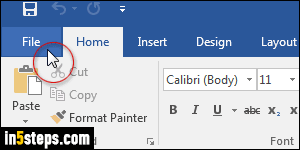
This tutorial's screenshots show Word 2016, but all steps are the same in Word 2013 and Word 2010: click on the File button (top right) and pick Options.
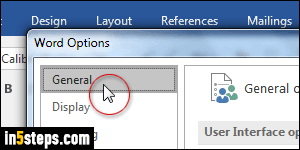
Make sure that the General settings are selected on the left.
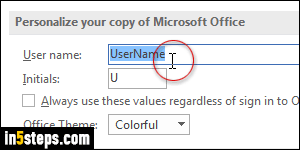
Under "Personalize your copy of Microsoft Office", type under User name what you'd like to appear as author name, and optionally type matching Initials. Notice that Word's Options dialog says Microsoft Office: this is because the username affects all Office products on that PC or Mac, not just Word. But each Windows / Mac user can use their own set of name and initials.
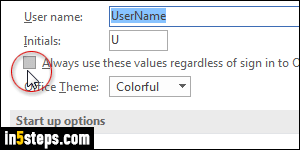
Since you can now log into Office apps with your Microsoft account, notice the following option: "Always use these values regardless of sign in to Office". If unchecked, the author name and initials will automatically be updated depending on who is currently signed into Office. Check that checkbox to keep that name the same at all times. Click OK to save your new settings!