Apple, through iCloud, offers a free service that lets you locate --or even remotely erase-- your desktops or laptops running Mac OS X. It's great if you lose your computer, or if it's stolen. It's also useful if, like me, you keep forgetting where you last left your iPhone or iPad! But you first need to turn on that service (disabled by default for privacy reasons). For your iOS devices, here's how you enable Find My iPhone - it works for all Apple devices.
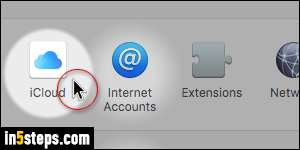
Click on the Apple logo in the top left corner of the screen, and pick System Preferences. When that window opens, click on iCloud (first in third row).
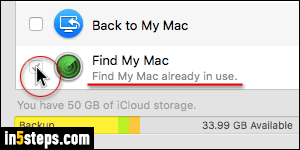
On the next screen, scroll to the bottom and check the Find My Mac checkbox. The only downside, which sort of makes sense, is that you can only enable Find My Mac for one Apple / iCloud user per computer. If it says "Find My Mac already in use", it means that another user has associated that machine with their account. Click the checkbox nonetheless, and enter the administrator's username and password to override and set it for your account instead.
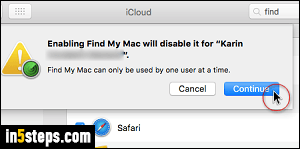
When the "Enabling Find My Mac will disable it for [other user's name]" message pops up, click Continue. You won't go through all that if your Mac was never set up. Next --in all cases-- click on the Allow button in the final, "Allow Find My Mac to use the location of this Mac?" confirmation dialog.
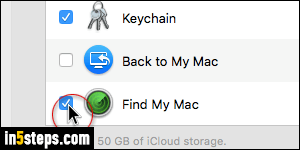
Find My Mac is now successfully set up (notice the difference in checkbox between this screenshot and the one in Step 3: a blue checkbox means that the service is enabled for you). Every time your Mac goes online, it will send an update of its location to iCloud, so that it can be located. Unlike your iPhone, which has an always-on cellular chip, Find My Mac isn't a real-time locator: but it's good enough to know where it was last spotted in the world!

