In recent versions of Mac OS X, Apple has changed how it handles screen resolution, but the steps are very close to what they were in older versions. Since this is a counter-intuitive concept, here's a review: a higher screen resolution makes everything on your screen smaller, but you are able to see more things at the same time. A smaller screen resolution makes everything bigger, which means that you can see less things on that same screen!

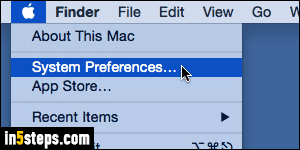
The following steps are the same whether you are using an iMac, Mac Mini, or MacBook Air / Pro, since they all run some version Mac OS X! Click on the Apple menu (top left corner of the screen), and select System Preferences.

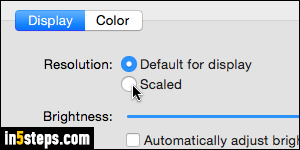
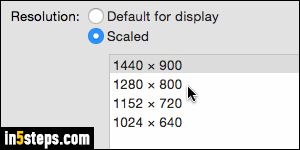
Click on the Displays icon (the first one in the second row). On the next screen, your Resolution is set "Default for display" by default. Select "Scaled" to see the available screen resolutions in exact pixel widths and heights.

Now pick a screen resolution you'd like to use: the advantage of having Apple make both the software (Mac OS X) and the hardware (a MacBook Air in my case) is that you only see screen resolutions actually supported by your display, all with the aspect ratio (proportions) matching your physical monitor. Possible exceptions come when you plug in a non-Apple, external display into your Mac. Once you found a resolution you like, you can close the window.

FYI: your display's resolution, or pixel depth, is unfortunately named the same way (confusing!), but only affects the maximum number of pixels the monitor can show at any point. Retina displays have a higher pixel density than other Apple monitors and built-in displays, but the screen resolution you pick yourself is a separate, software setting. A 5K display, like the ones found on the latest iMacs, show more details than any other monitors Apple currently makes.

